This applies to Tower Labels W116 (48up), W117 (15up), W118 (6up)
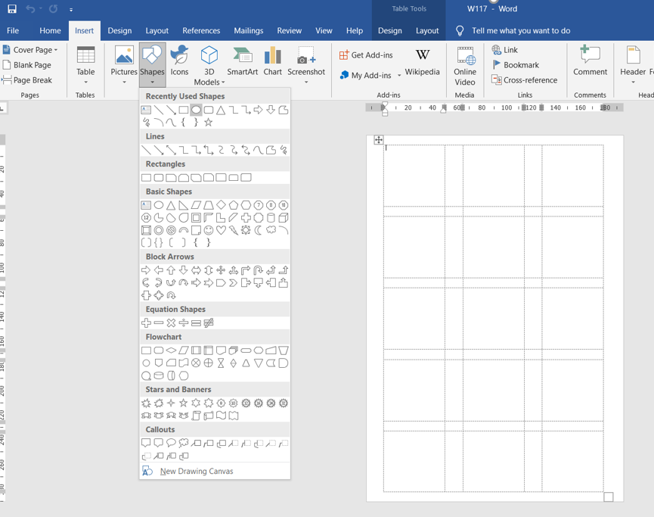
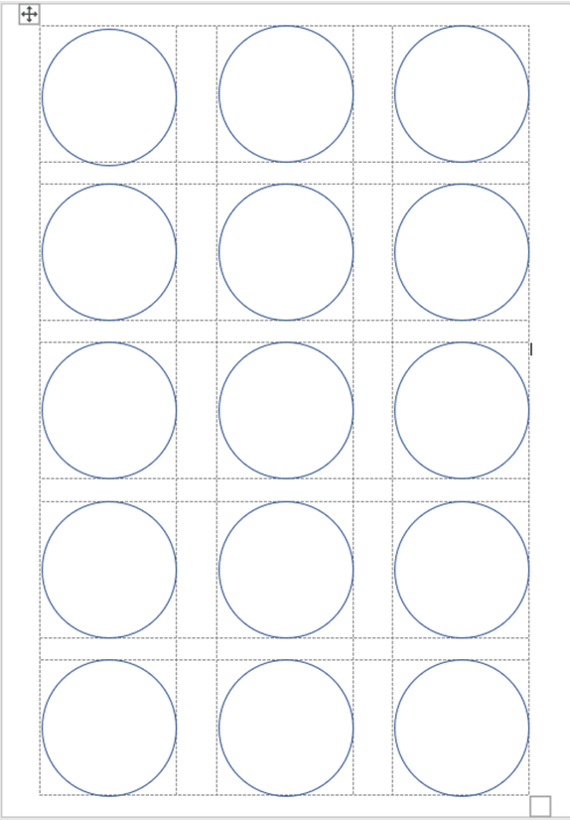
MS Word doesn’t allow circles, and that’s why the circles weren’t coming up on the sheet. It’s formatted as squares. It will still print out as the correct label, but as a guide for yourself, place circles on the labels (you’ll remove it later).
How to insert circles on your template.
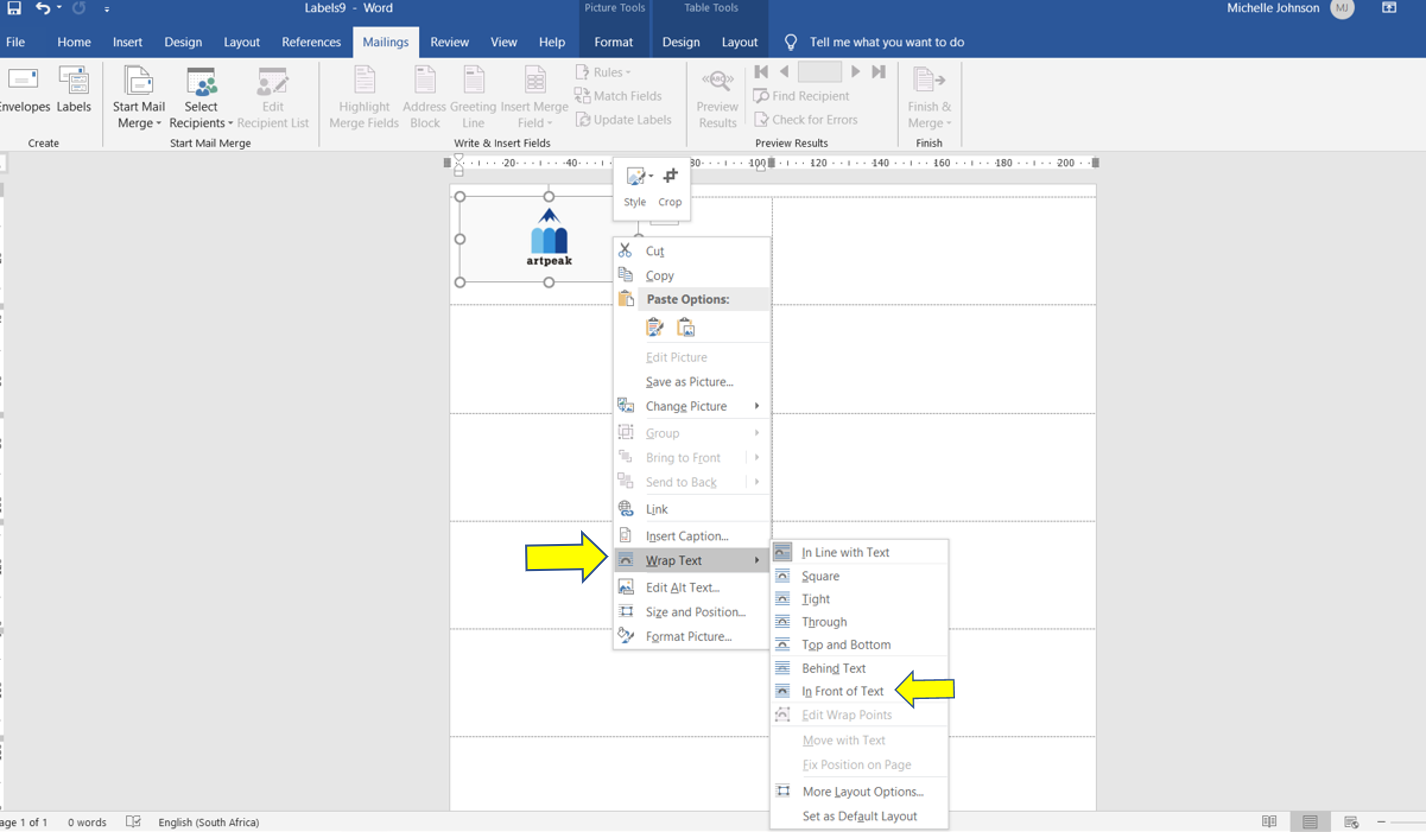
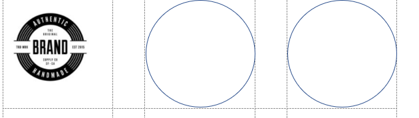
Placing the image on the label:
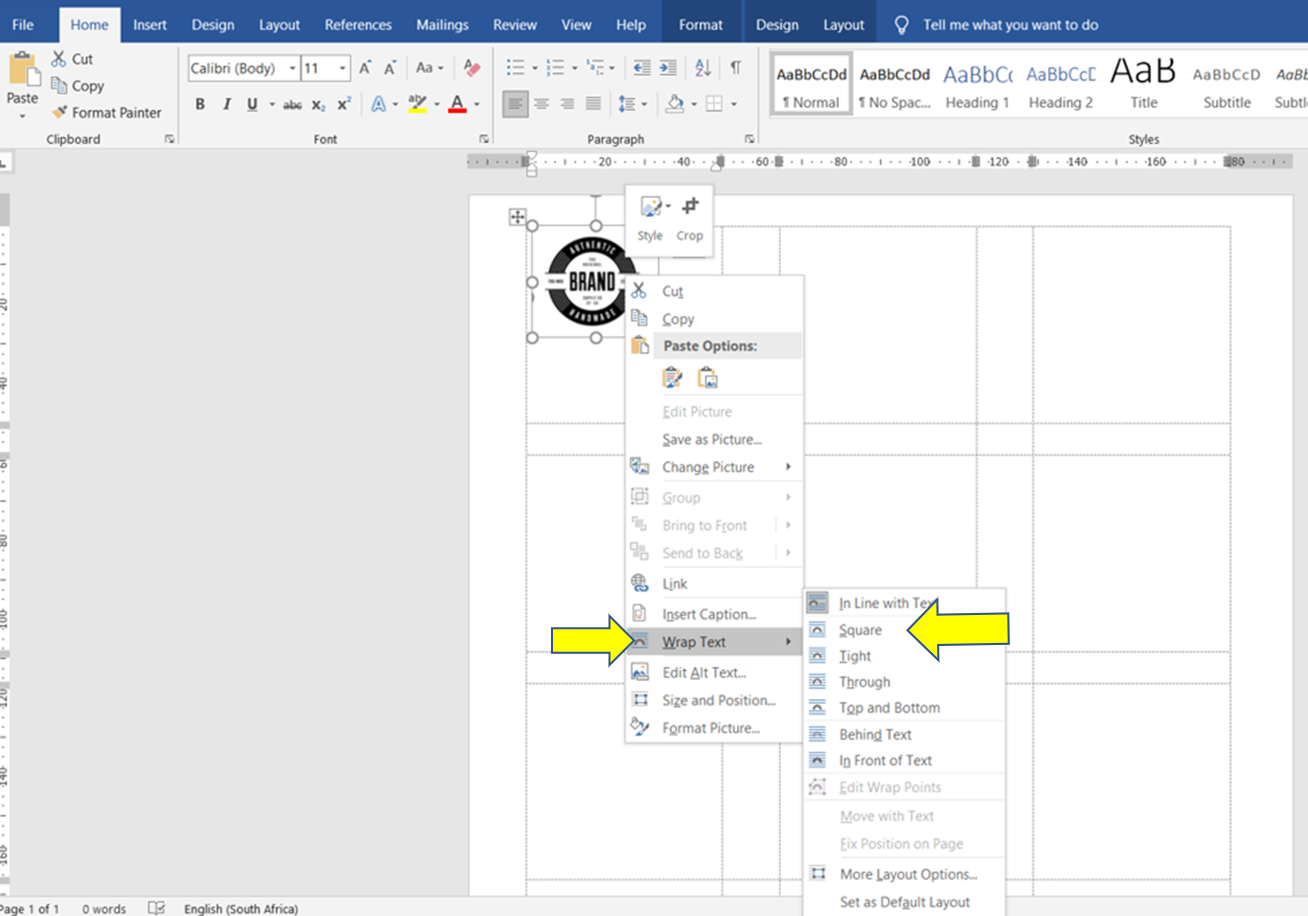
Right-click on the image, and select In Front of Text.
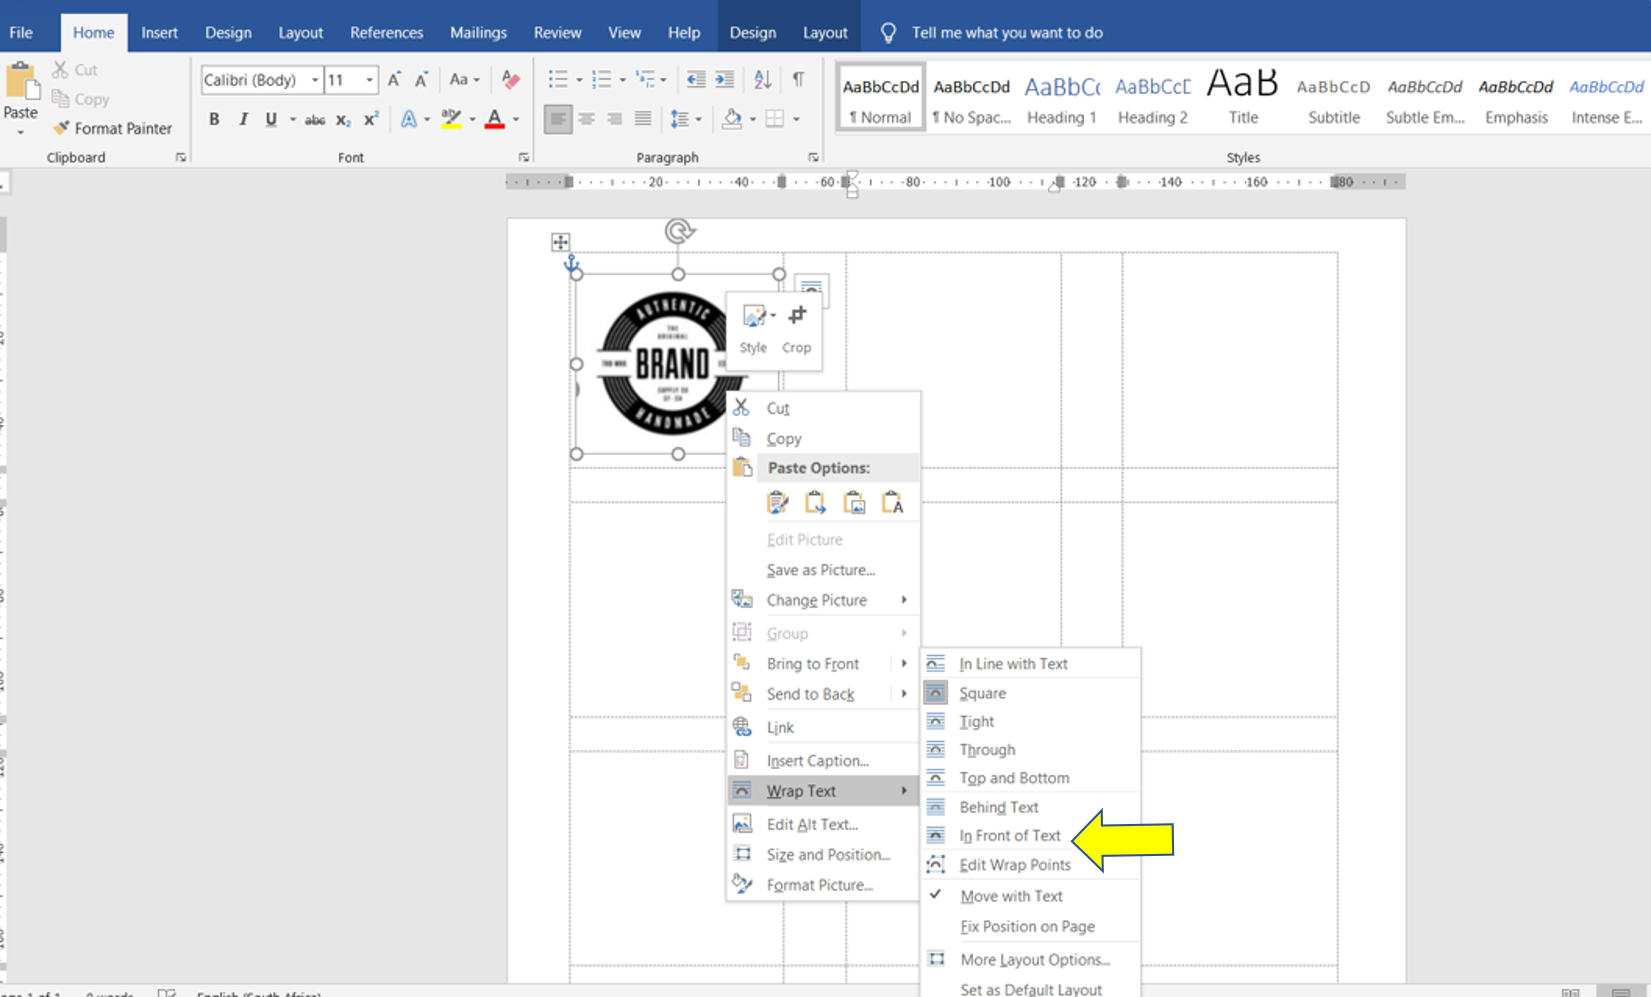
Once you’re happy with the alignment, delete the circle behind the image.
Printing – you can only print 1 sheet at a time.
Please do a test to check to see everything is aligned.
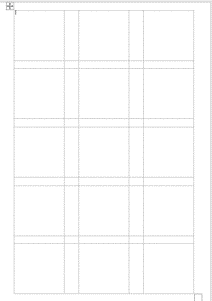
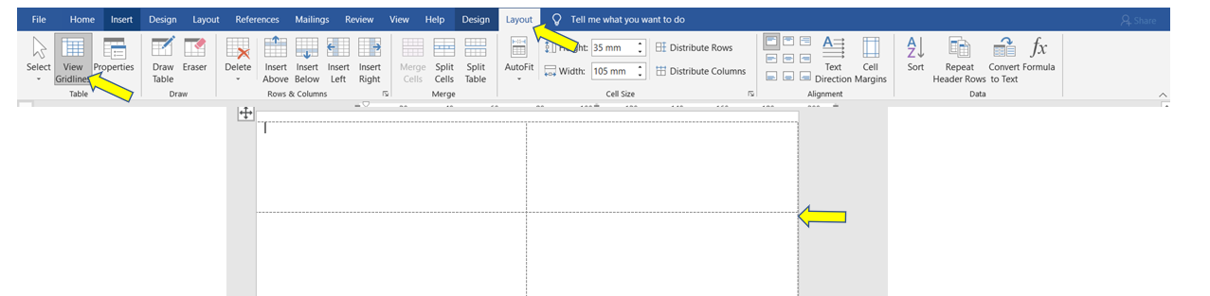
If you’re working in Microsoft Word and your gridlines disappeared, you may need to enable the gridlines in order to see your actual card or label cells.
If the template looks like a blank page, select Table Tools > Layout > View Gridlines to view the template layout.
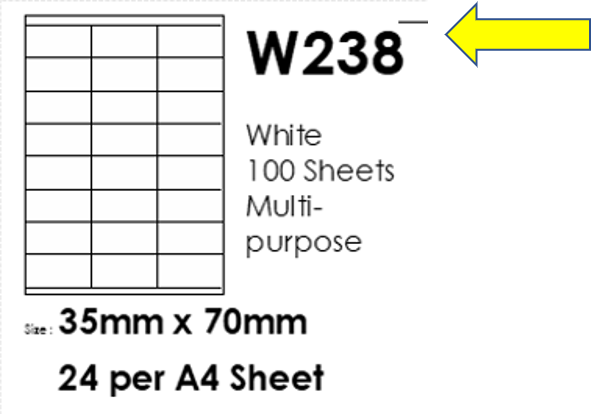
The product and template number is the four or five-digit number usually shown in large print in front of TOWER product packaging.
It is also displayed on the page of the label. And at the back of the label.
Eg W106, W330
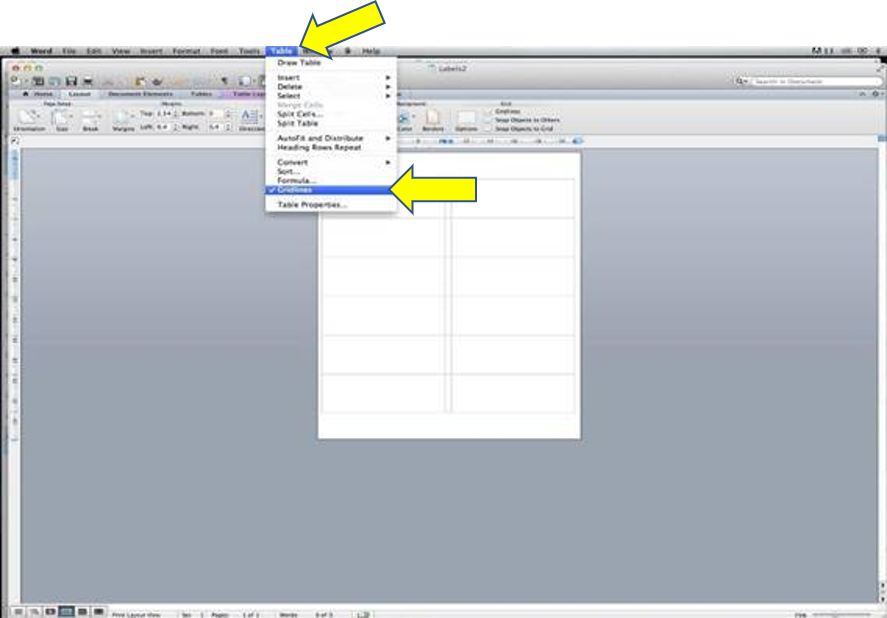
Open up the template in Word for Mac.
Templates may appear to be blank/blank page initially.
If this happens, it means that you need to activate gridlines.
How to view gridlines on Word for Mac:
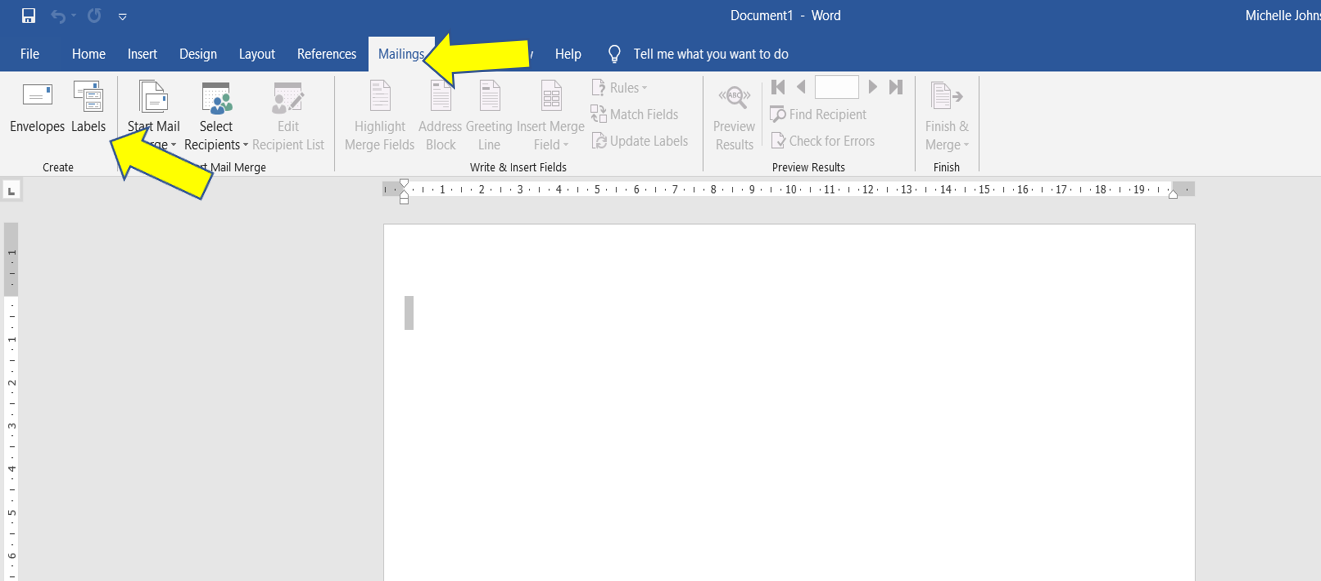
How can I print multiple labels on MS Word with 1 name/record?
Mail merge with TOWER labels:
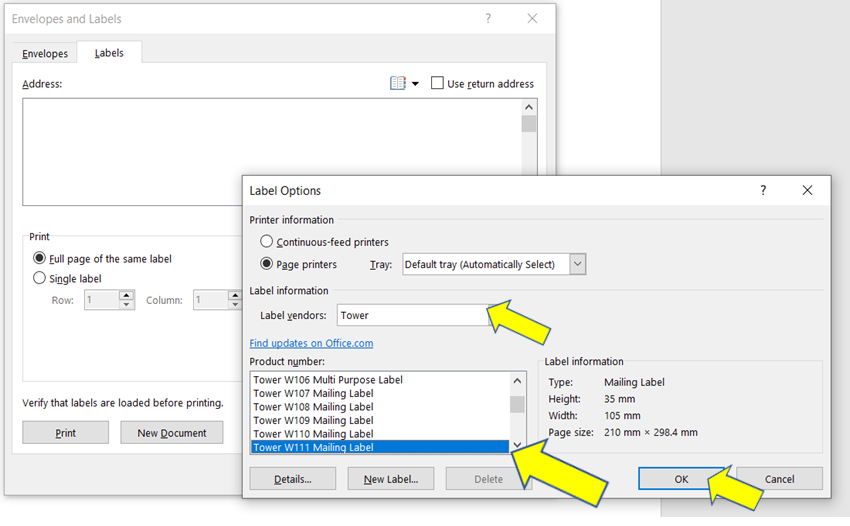
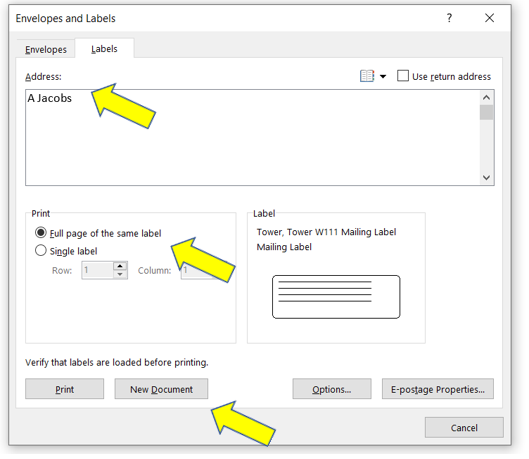
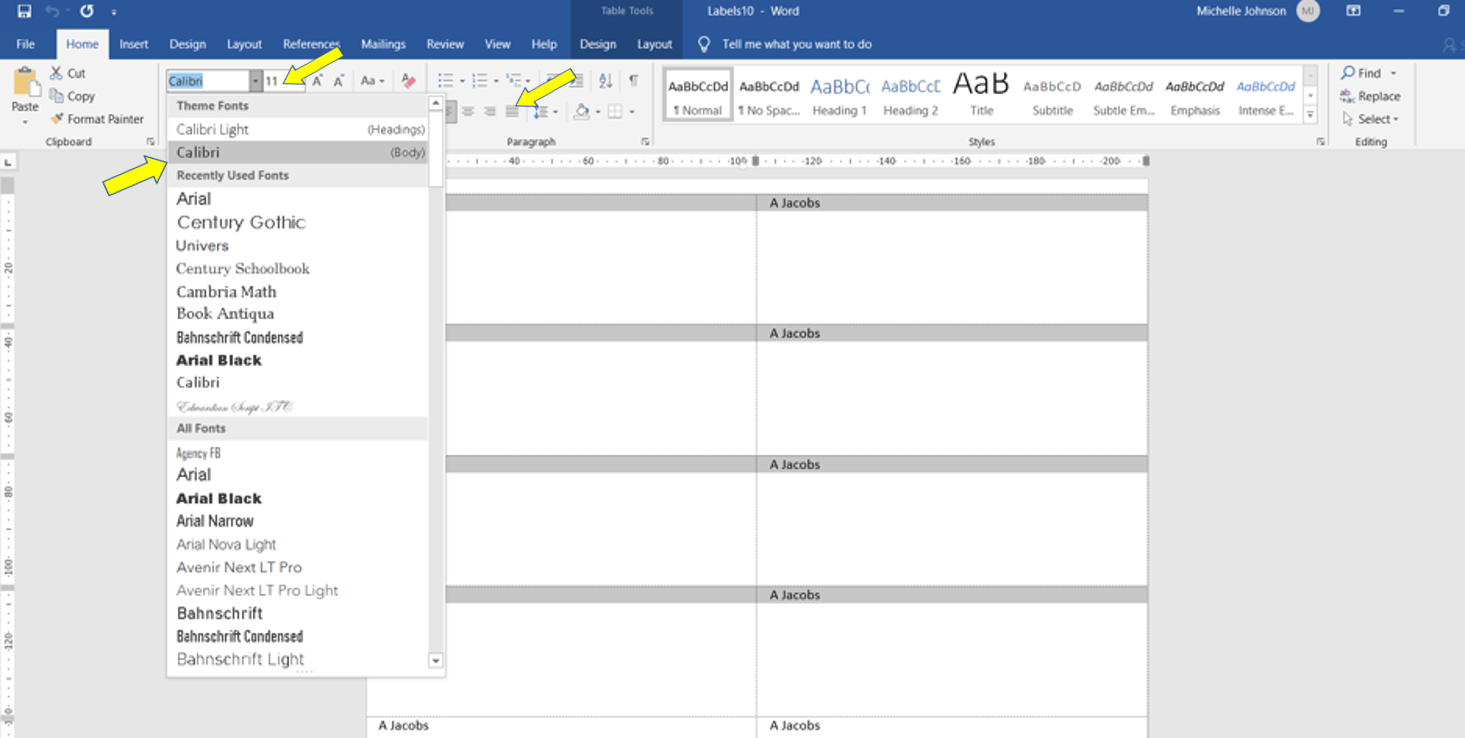
When you want to repeat 1 name/word on one sheet of labels – eg. A Jacobs – name repeated on a TOWER W111 label.
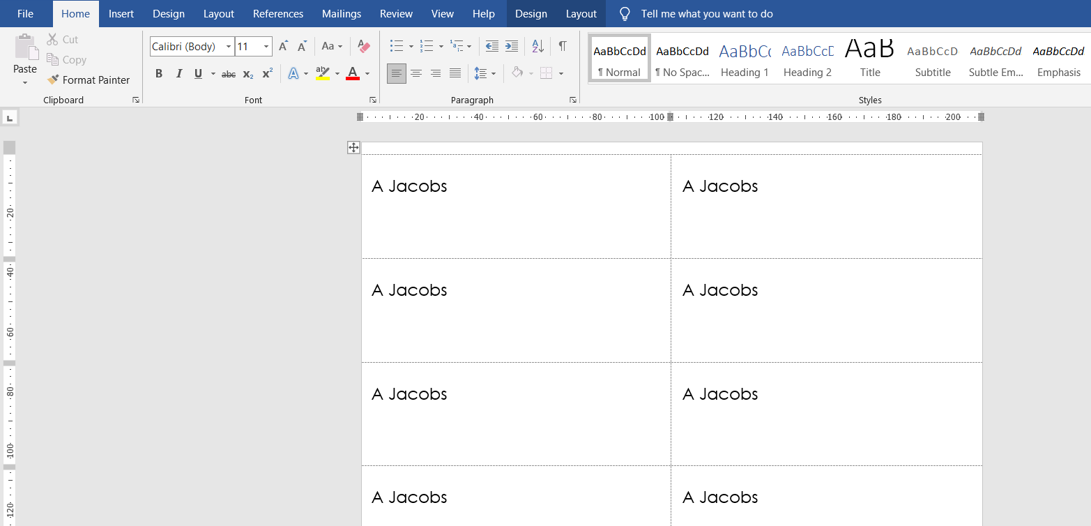
To make sure you don’t waste your label, or make a mistake, do an initial test on your printer on plain A4, and make sure you use the correct printer tray.
Confirm printer settings
Often printers are set to Letters (280mm) and it should be set to A4 labels (297mm)
Check all your settings and change them all to A4.
In MS Word:
Computer settings:
Step 1:
Check your printer settings
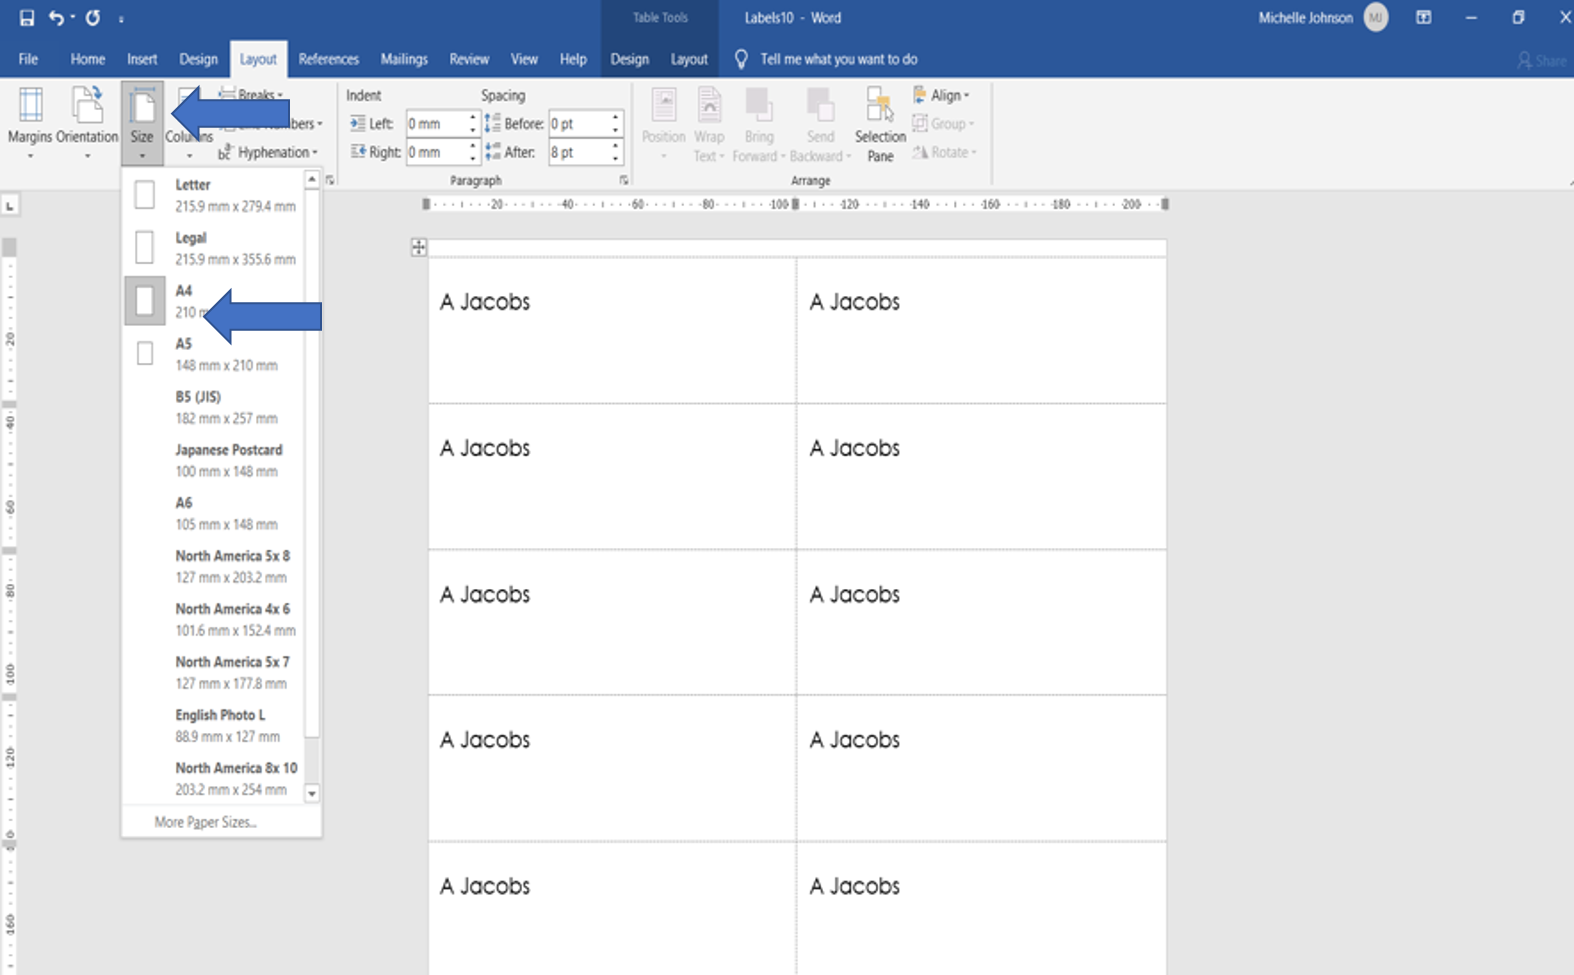
Word: Layout > Size > A4
Step no. 2
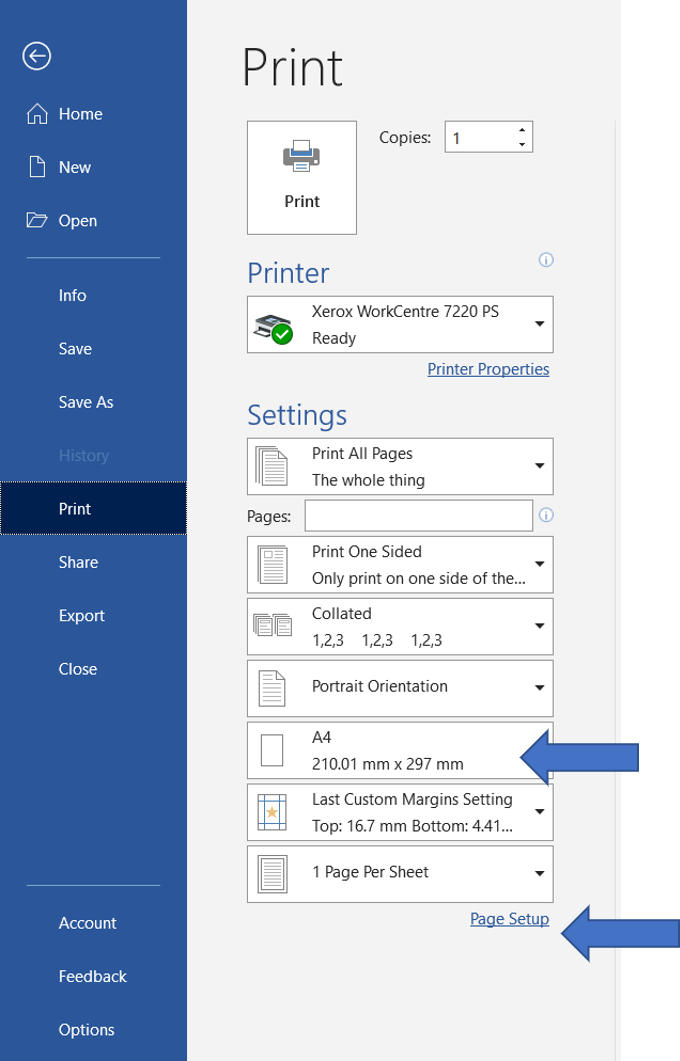
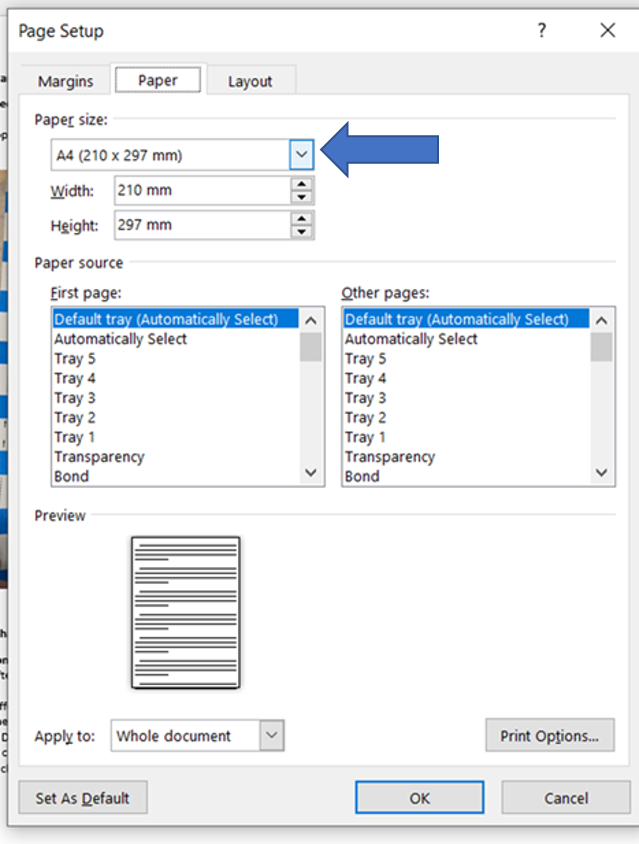
Word: File > Print > Page set up > Paper > A4
Step no 3:
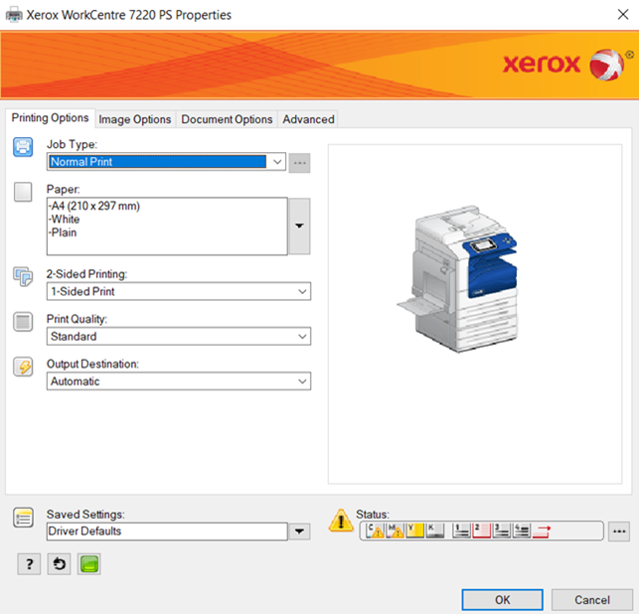
Check your printer settings
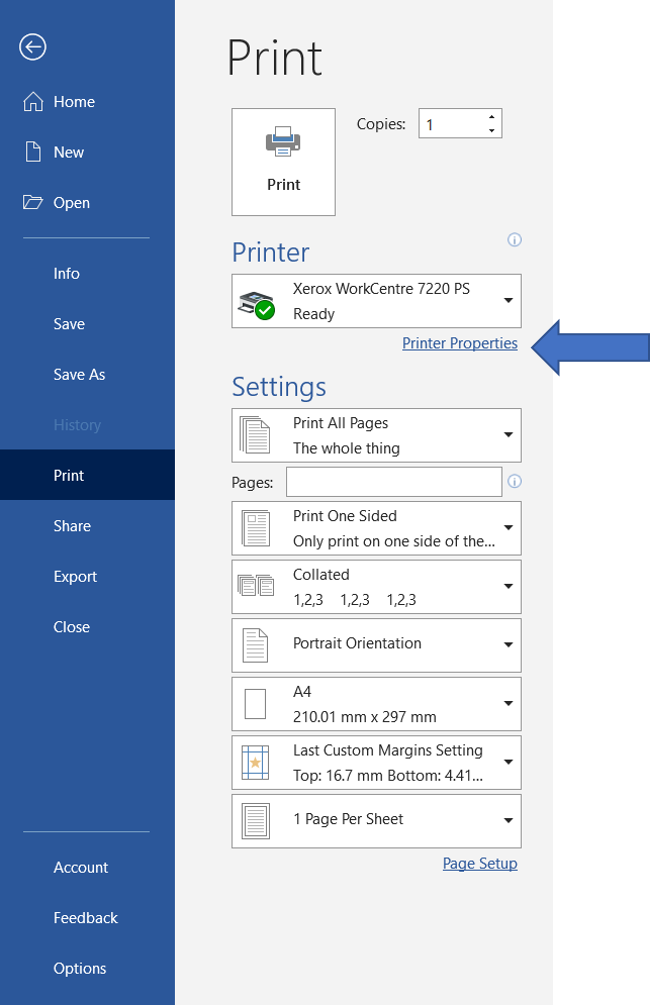
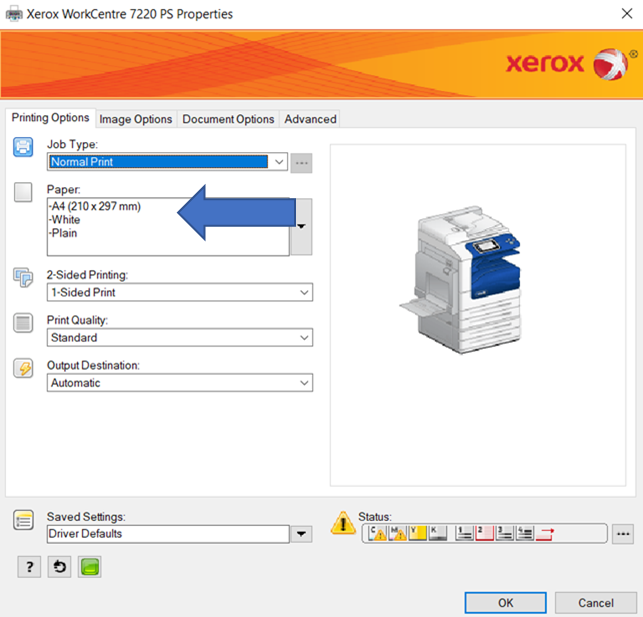
Word: File > Print > Printer Properties > Select A4
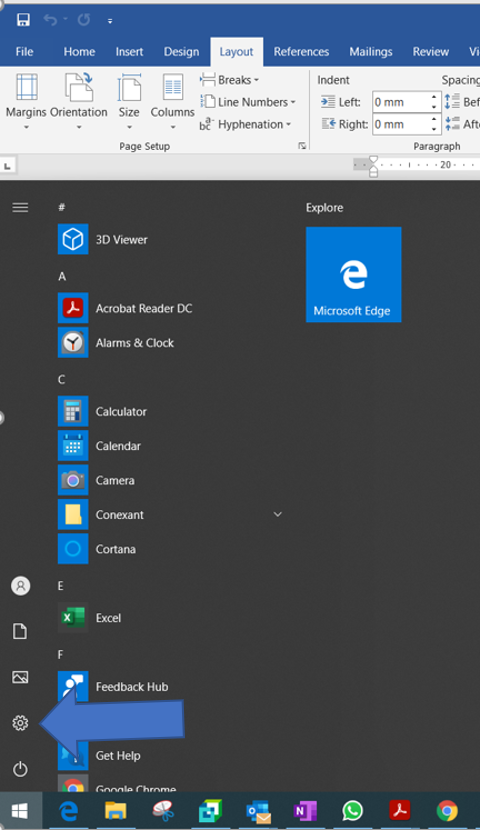
Step 4: Computer Settings:
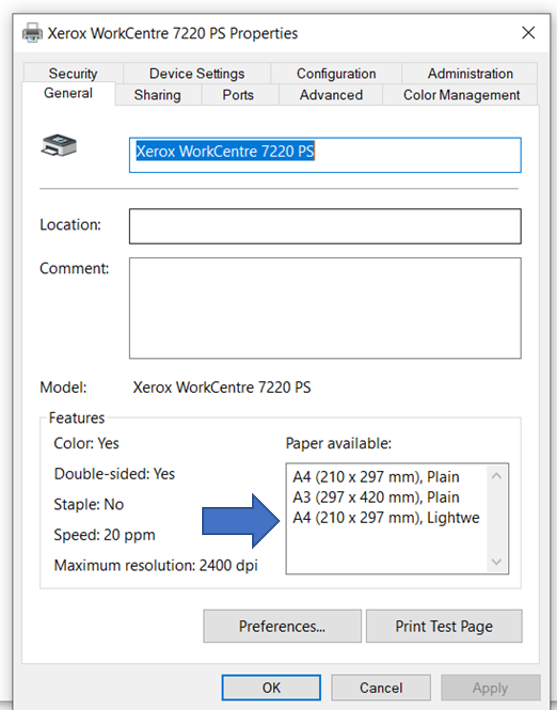
Check Device and Printer settings to make sure it’s registering A4 –
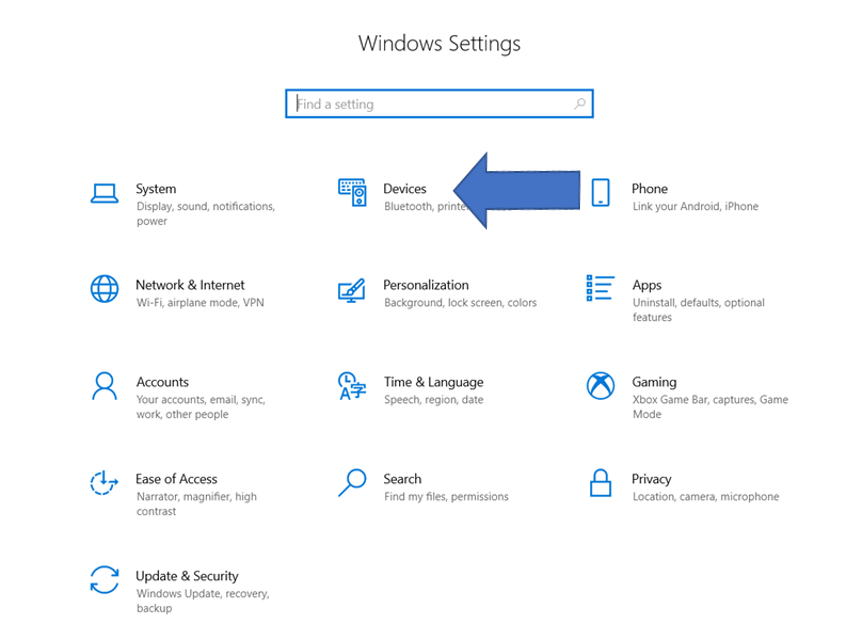
Settings > Devices > Printers and scanners > Select your printer > Manage your printer > Select printer properties > General > Paper Available
Look at the Store Locator, or Online Retailer page. Or call our Consumer Helpline Toll-Free 0800 220 488.
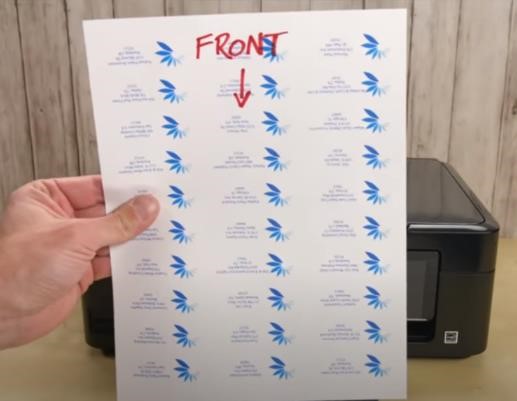
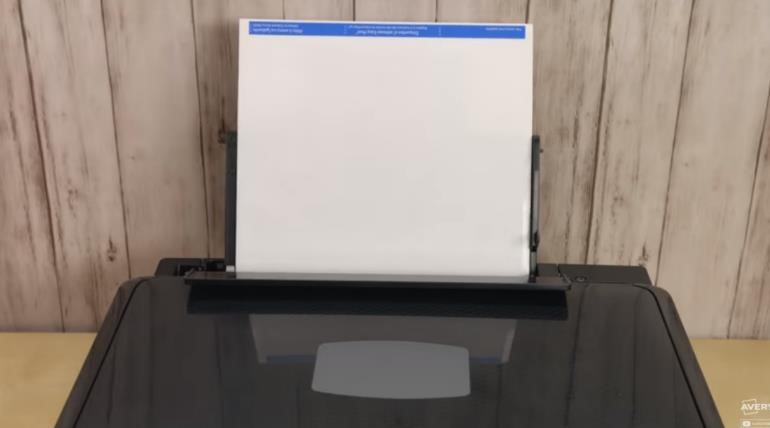
First, print a test page on a sheet of blank paper to determine which direction to feed into your printer and to check your design and alignment. Drawing an arrow on your test page will be helpful for this exercise.
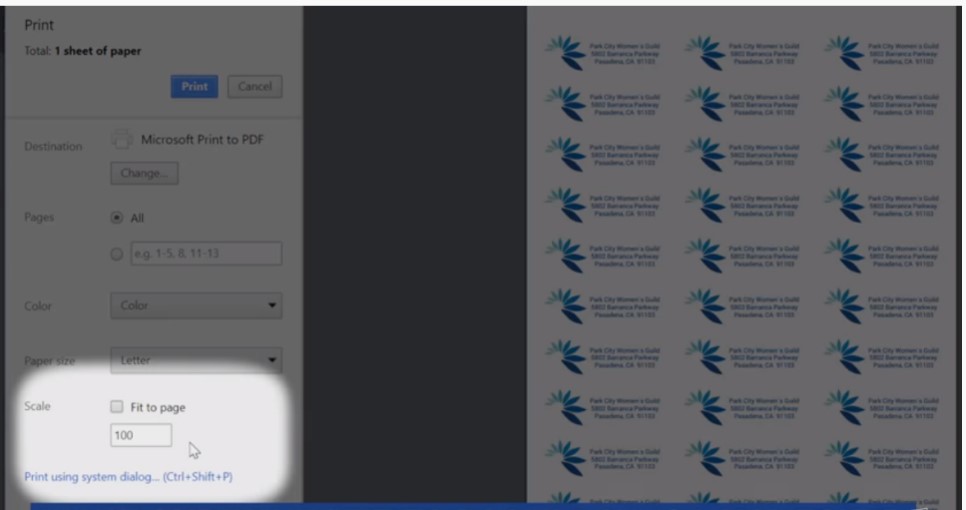
2. Print actual size (100%) – Never “Fit to Page.”
If you’re printing a PDF, make sure the “Fit to Page” box is not checked. Otherwise, your printing will not be printed at the actual size and won’t align properly to the product.
3. Page set up
Make sure your printer and document is set to A4.

4. Printer settings
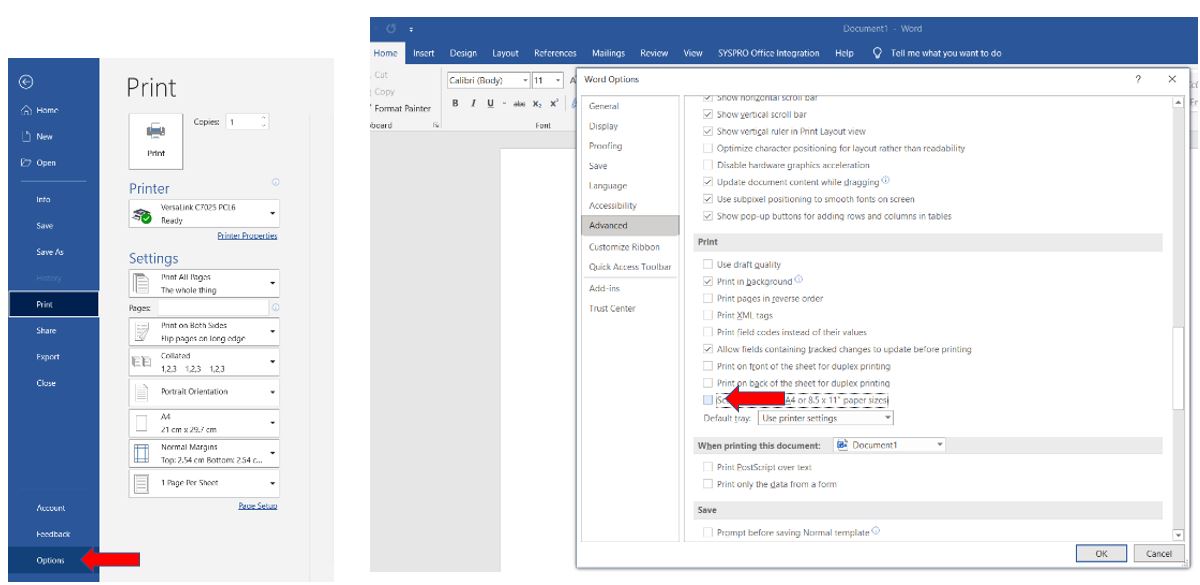
On Ms word, go to options click on advanced and scroll down to print setting. Make sure “Scaled content” is unticked.
5. Paper settings
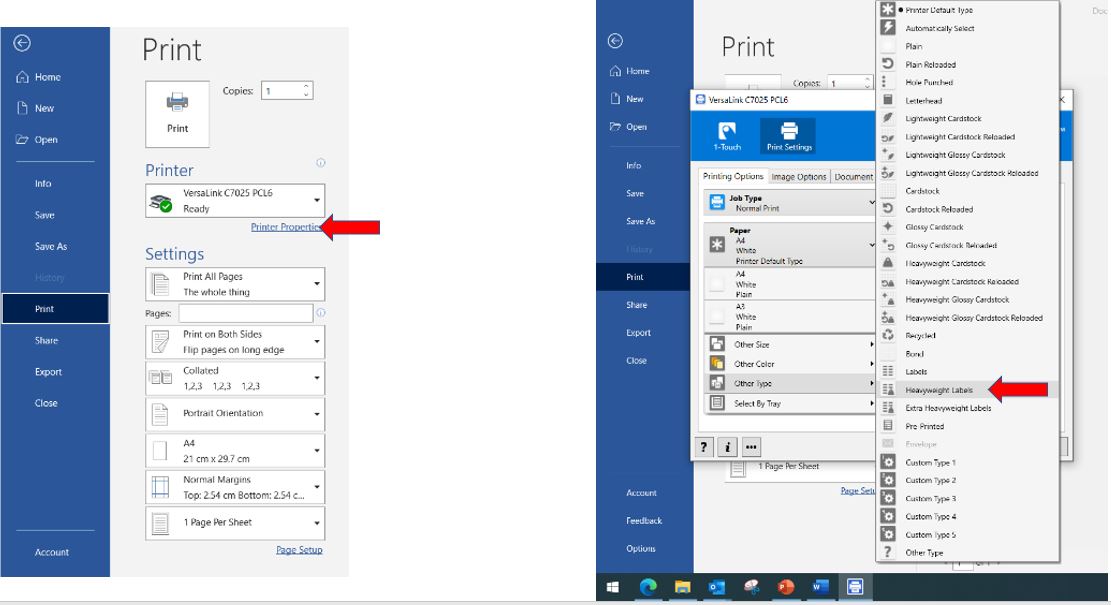
After you click Print, click on Properties or Preferences, where you’ll find Paper options. For laser printer labels – change the Paper Type A4 “Heavyweight” or “Cardstock“.
6. Windows devices settings
Check device and printer settings to make sure its registering A4.
Settings > Devices > Printers and Scanners > Select your printer > Manage your printer >
Select “printer properties” > General > Paper Available.

7. Manual feed
Some printers are problematic and may need the labels to be fed into the printer one sheet at a time using the manual tray.
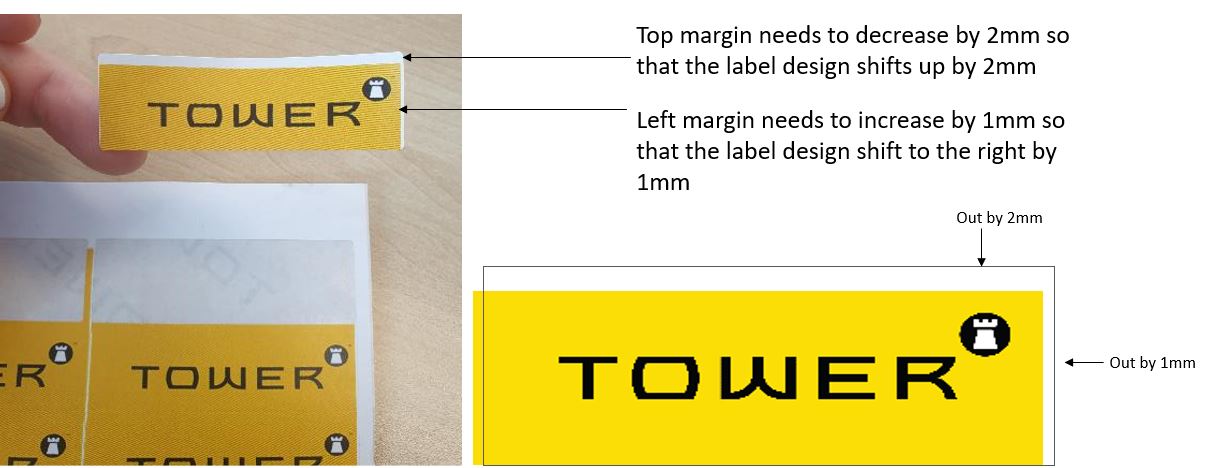
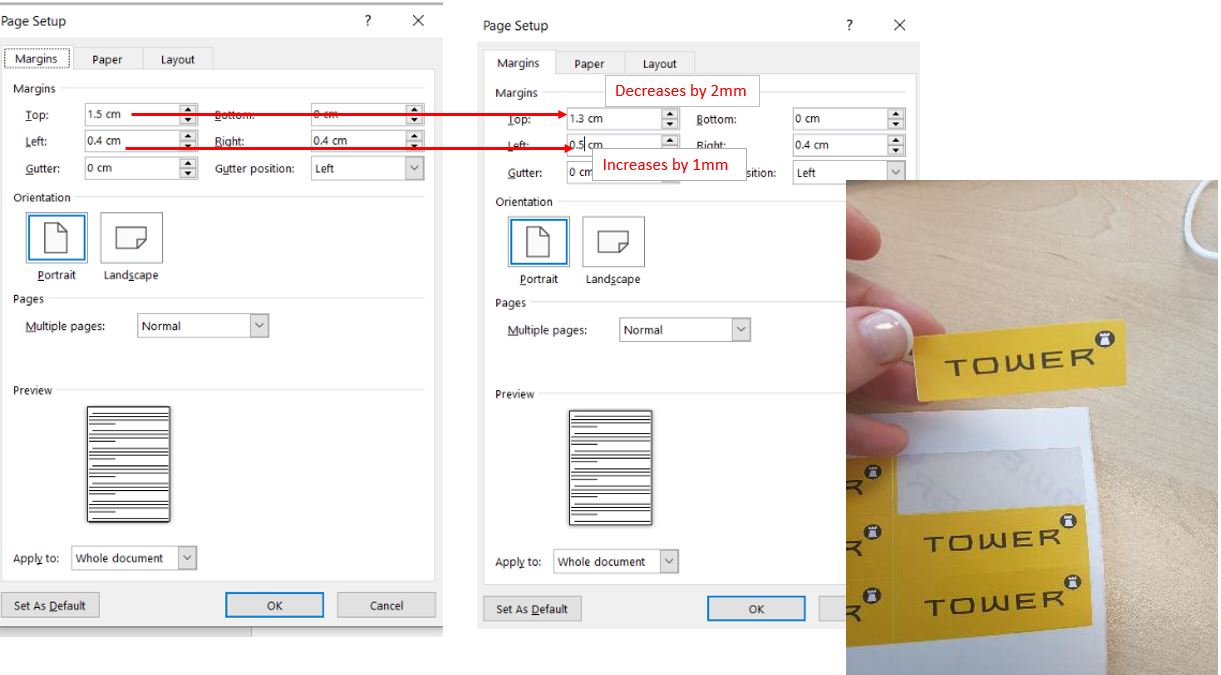
8. Print adjustment
If your printer is shifting your design by a consistent amount of space,
Then either Increase or decrease the margins by the amount that the design has shifted. Lets look at an example.